August 31, 2010

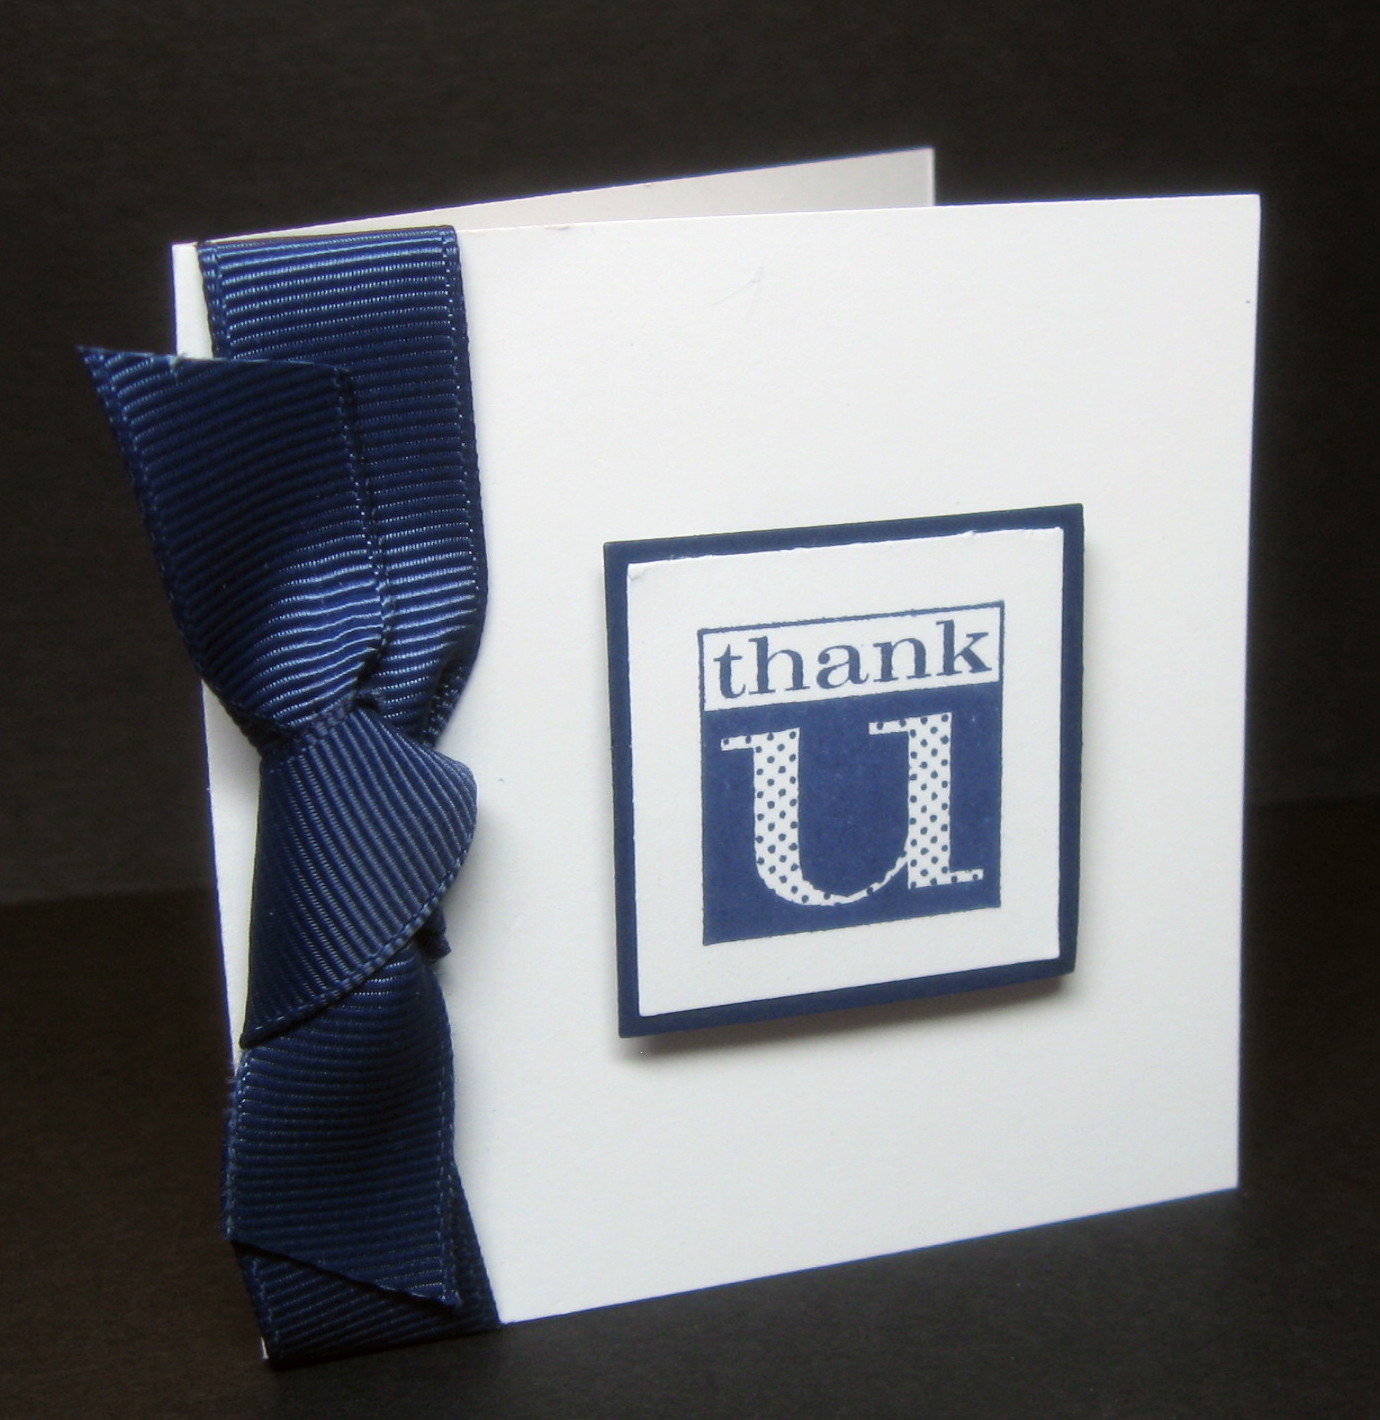
A 2 Minute Card and a 15 Minute Card

  Today's card was inspired by the Body & Spirit Day Spa.  Let me explain.  My husband is the sweetest guy I know and loves to give me gift certificates to Body & Spirit.  Cheryl gives fantastic pedicures and Leigh is by far the best massage therapist we know (we can't say enough about her!).  Because both ladies are so good at what they do I like to give them a gratuity at the end of the service and a little thank you note to go along with it.  I've found that 3x3 cards are the easiest to give and take only minutes to make.  This card took about two minutes to make.
    

     I also wanted to make a more detailed card for a co-worker who really helped me out this summer (thanks Kim!).  Because I'm giving her a gift along with the card I decided to revamp the card a bit and add a touch more detail. 


    For the second card I "dyed" the brads Night of Navy to match the cardstock and added Extra Thick Embossing Enamel to the sentiment (I know it's hard to tell from the photo).  If I were to make this card again I would run the Whisper White cardstock through the Big Shot with the Perfect Polka Dots embossig folder (pg 214, $7.95) for a textured background.  The second card took about 15 minutes to complete.

Stamps: Cute By the Inch (hostess)
Paper: Whisper White, Night of Navy
Ink: Night of Navy classic and craft
Tools & Accessories: brads, ETEE, square punches, 5/8" grosgrain ribbon, dimensionals

August 27, 2010

A Note of Thanks

     Hello!  This is another card I made using the "dyed" brads technique.  I was inspired to make this card after looking through my embelishments drawer and seeing the 5 containers of Circle Designer Brads that I hadn't touched since I purchased them months ago!  Unfortunately, the circle brads have long since retired but Stampin' Up! does still offer the Flower Designer Brad (pg 187, $5.95 for 16).  I still have tons of the brads left so don't be surprised if they show up in projects for the next few months!

Stamps: Thank You Kindly
Paper: Very Vanila (textured and smooth), Cherry Cobbler, Riding Hood Red, Baja Breeze, Not Quite Navy, So Saffron, More Mustard
Ink: More Mustard, Cherry Cobbler & Not Quite Navy craft ink, Stazon black
Tools & Accessories: Paper piercing tools, Circle Designer brads (retired), dimensionals

August 23, 2010

A Purple Card and Brads to Match!

Hello!  Today's card is inspired by Beth Ann Wilson's card.  While I absolutely love the colors she chose, I decided to tone it down a bit and went with Perfect Plum.  While Stampin' Up! does offer a wide variety of colored brads I currently do not have any in my collection.  Bummer.  But... the good news is you can "dye" brads to match any color cardstock and it's super easy!
     Simply cover the brad in your choice of craft ink (in my case I used Elegant Eggplant), coat with clear embossing powder and heat until melted (for small brads this is 8-10 seconds).  I've found that you may need to rough up the brad a bit with a sanding block if the ink isn't sticking too well.  Make sure you let the brad cool for at least a minute before you try to use it - it will be hot!   I'll be honest and say that once you've "dyed" your brad you shouldn't handle it too much - the color will eventually come off. 

Stamps: Great Friend
Paper: Perfect Plum, Elegant Eggplant, Whisper White
Ink: Elegant Eggplant (classic and craft), VersaMark
Tools & Accessories: Big Shot, Perfect Polka Dots embossing folder, clear embossing powder, heat tool, dimesionals

August 22, 2010

Punch Caddies Not Available...

     Stampin' Up! is disappointed to report that due to serious production and quality issues with the manufacturer, they will not be able to offer the Punch Caddies (pg. 200) at all. And because the manufacturer will likely not be able to meet SU's high quality standards for the Punch Caddy in the future, they do not have any plans to offer a revised or equivalent product in its place.
     Stampin' Up! is disappointed that they cannot offer the Punch Caddies for sale. But because of their ongoing commitment to providing customers with the highest quality products, they simply cannot allow this product to go live.

     Bummer... :(

August 19, 2010

Christmas in August

     Hello!  Today's project is a Christmas tag we'll be making at my next Stampin' Up! workshop at the end of the month.  Christmas is still a ways away but I like to get my customers thinking about cards and tags they may be giving so they'll have plenty of time to order supplies and actually sit down and create before the hustle and bustle of the holiday season hits. 
     I used a snowflake from a Sizzlits set purchased at nation-wide craft store chain.  Stampin' Up! offers a very similar set (pg 211, $19.95 for a set of 4) or you could certainly use the Snowflake Extra-Large punch (pg 200, $16.95). 
     You'll notice that the button on the snowflake is made of paper.  This is because I don't have a large selection of buttons and have found that the Button #5 Sizzlit die solves the problem!  As long as you have the cardstock you can make a button to match any project - I love that!
    

      Here is the same tag but in Cherry Cobbler.  To give the snowflake a different feel I covered it in white Chunky Essentials Stampin' Glitter.
     While these tags are super cute and super easy to make, I'm working on a few other projects that use the Two Tags die in unique ways. I've found a great tutorial on how to make a box using two tags that I can't wait to share.

Stamps: Holiday Happiness, Holiday Collection (retired)
Ink: StazOn black, VersaMark
Paper: Bashful Blue, Certainly Celery, Whisper White, Chocolate Chip, Cherry Cobbler, Old Olive
Tools & AccessoriesTwo Tags die, Merry Details, Buttons #5 and Snowflakes Set #3 (purchased at Michael's) Sizzlits dies, Big Shot, hemp twine, ribbon, Chunk Essentials Stampin' Glitter, brad

August 15, 2010

Watercolor Wonder Crayons


     Watch as Stampin' Up!'s Shannon West performs wonders with our Watercolor Wonder CrayonsWatercolor Wonder Crayons are water-soluable and easy to blend.  Use with blender pens or aqua painter for stunning results.  While the technique Shannon uses is timeless, please keep in mind that this video was created before the release of the 2010-11 Idea Book & Catalog and some of the colors have since retired.  The crayons can be found on page 194 of the current IB&C and are $16.95.  Watercolor paper can be found on page 170 of the current IB&C and is sold in packs of 20 sheets (3-3/4" x 5") for $6.95

August 12, 2010

Birthday Elements

      Hello!  Today's card is a CASE of a sympathy card I made earlier which was inspired by the many wonderful examples on SplitCoastStampers.
     I love the simplicity of black and white and I think the Real Red color just makes the card pop.  Although Stampin' Up! now carries Basic Pearls (pg 188, $4.95 for 150) the pearls on my card were purchased at Michael's and adhered with a dot of Tombow Multipurpose Glue (pg 197, $3.95).

Stamp Sets: Elements of Style, Well Scripted (retired)
Ink: StazOn black, Real Red & Certainly Celery Stampin' Write Markers
Paper: Whisper White, Basic Black
Tools & Accessories: Stampin' dimensionals, peals (non-SU)

August 8, 2010

New Punch Style


     Popular Stampin' Up! presenter, Bonnie Thurber, discusses the many benefits of Stampin' Up!'s new, sleeker punch body style.  Punches and the punch caddy can be found beginning on page 200 of the 2010-11 Idea Book & Catalog.

August 6, 2010

Dinner Was So Good I Had To Take a Picture!

     Ever had one of those meals?  In my case, this is a very rare occurrence so I wanted to make sure it was captured on film.  According to my husband, this may be the best salsa I've ever made!  Considering this is only the fourth time I've made salsa I'm thinking that's pretty good!
     It all started with a recipe in the August issue of Family Circle featuring easy 20-minute summer dinners.  Aaron and I are big fans of chicken and salsa and since the recipe called for both I thought I'd give it a try.  The chicken was grilled on our Foreman Grill with just a little bit of McCormick Montreal Chicken Seasoning and a chicken bouillon cube was thrown into the brown rice while it was cooking to give it a bit more flavor.  The next time I make the salsa I will definitely add a can of black beans to add a bit more color and extra protein.  Here's the recipe for the salsa:

1 1/2 lbs ripe tomatoes, seeded and chopped
1 1/2 cups fresh corn
1 large sweet red pepper, seeded and chopped
3/4 cups fresh cilantro leaves, coarsely chopped (must be fresh!)
2 tablespoons EVOO
2 tablespoons lime juice (does not have to be fresh squeezed)
3/4 teaspoon salt

1. In large bowl, stir together tomatoes, corn, red pepper, cilantro, EVOO, lime juice and 1/2 teaspoon of the salt.  Cover and refrigerate for 1 hour. 

     How easy is that?!

    The recipe makes enough for four servings so we had left overs and ended up using the salsa as a side dish the next night.  It would also be really good on tacos or nachos or by itself with a bag of tortilla chips!

August 2, 2010

A Week at the Beach


     My summer vacation has been very busy this year.  Besides teaching summer school and lots of "day-cations" with my husband on Mondays (the only day we have off together), I've also had some time to enjoy the wonderful summer sun.  Last week a few members of my family rented the family beach house and you can imagine where I spent most of my free time last week! 
    When we weren't reading books on the beach, spending time in the incredibly warm water (62 degrees is warm for us New Englanders!) or playing Apples to Apples (love that game!) we were jumping off bridges and whale watching.  It was nice to spend time with the family, especially the ones I don't get to see very often.

                                                                                     This would be my uncle leading the way off the bridge.  While it may not seem that high in the photo, I can guarantee that it's a lot higher than it looks when you're the one about to jump! 

     And this is just a small portion of my family, we're missing quite a few members!

July 30, 2010

If I Made This Card Again I Would...

     Ever made a card and found yourself thinking, "Gee, if I made this again I would definitely change...."?  That's exactly what I was thinking after I made this card.
   The original, here on the left, was inspired by the colors in the Autumn Traditions DSP from the 2009-10 Idea Book & Catalog (I love those colors!).  After I made it I stepped back and kept thinking that there was something not quite right with the card.  It's an ok card but I found myself thinking that if I made the card again I would change a few things.  On the inside of the card it was easy to see the the paper piercing was not up to code; it was crooked (something a perfectionist like me just cannot handle!).  That was one thing that needed to be changed.  I had also toyed with the idea of popping the scalloped squares up on dimensionals but changed my mind at the last minute.  Those had to be raised so that would be the second thing I'd change.  And let's talk about the ribbon - it's just all wrong.  I love Elegant Eggplant but I don't have the 5/8" grosgrain that I thought would look great with this card so I paired it with chocolate chip.  Hmmmm, that would be change #3.  And the panel in the middle needed something else.  More piercing?  Done, change #4. 
  But it was too hot and humid in the craft room do do anything about it then so I left the card and came back to it a day later. 
    And here is the remake of the original (who says you can't remake a card, they do it to movies and songs all the time, right?).  Much better the second time around!
   
Stamps:  Cute by the Inch (hostess)
Paper: Always Artichoke, More Mustard, Ruby Red (retired), Elegant Eggplant
Paper:  Crumb Cake, Elegant Eggplant, More Mustard, Ruby Red (retired), Always Artichoke, Whisper White
Tools & Accessories:  Paper piercing tools, white ribbon, dimensionals.


     And on a different note,  I couldn't resist adding a photo of the awful working conditions I'm subjected to!  Being such a creative person takes not only time but also space.  I have one little area in our spare bedroom in which to create my masterpieces, and as you can see from this photo, Floyd doesn't understand the concept of personal space yet.  Unfortunately, this is a fairly frequent occurrence in my "stamping studio", making it quite difficult to produce the little works of art my customers have become accustomed to.  Oh, I could simply close the door to the room but then I would have to listen to his downright pitiful meows as he scratches at the bottom of the door, waiting for me to open it.  And then when I do open the door there's that heartbreaking look.  The one that says "I only want to come visit with you, pleeeeeease let me in... I love you..."  Oh, deary me, it's a good thing my little buddy is so gosh darn cute...

July 22, 2010

Birthday Card Fit for a Man

Hello!
     Today's card was inspired by, of all things, an Embosslits Die!  Found on page 215 of the 2010-11 Idea Book & Catalog, the Thanks Embosslits Die is a chemically etched die that can simultaneously cut and emboss an image when used with the Big Shot machine. 
     Being a stamper you'd think that I was pretty good at sending out birthday cards to friends and family members...  um, not so much.  I can't use the excuse that I forgot a birthday, especially since I have a Birthday Calendar (pg 170, $7.95) filled in with all the important dates. For some reason I fail to actually make the cards and get them in the mail.  Or if I do get a card in the mail it's always a store bought card (gasp!) and usually a day or two late.  I think my lack of enthusiasm for birthday cards may be due in part to the fact that there are a lot of males in my family.  While I'm pretty good at creating (or CASEing) cards with bright colors and lots of pretty ribbons and other embellishments, what I'm not so good at is creating masculine cards (men are not only hard to shop for but they're hard to create cards for!).  So I challenged myself this week to create at least one card that could be easily reproduced and sent out to family members. 
     I chose masculine colors and aimed to keep the card itself simple.  I know it's hard to tell from the photo but the stripes were embossed with clear embossing powder to give it a bit more texture.
    
Stamps: Solid Stripes, Bitty Birthday (retired)
Ink: Night of Navy, VersaMark
Paper: Crumb Cake (aka, Kraft),  Whisper White, Night of Navy, Brocade Blue (retired)
Tools & Accessories: Brads, dimensionals, wide oval, modern label extra-large and word window punches

July 17, 2010

Introducing Stampin' Up Colors...


     Join Carrie Cudney, one of Stampin' Up!'s amazing facilitators, as she discusses how to use Stampin' Up!'s exciting new color collections from the 2010-2011 Idea Book & Catalog.

The Card That Took 2 Days to Make...

     ... and not because it's a technically difficult card but because I am so darn indecisive.  The finished product is nothing like my original idea.  In fact, the only element that is the same is the stamp set. 
     I began this card several days ago when I tried to use the Scallop Square Bigz die for something other than a rag quilt purse.  I had it all planned out: a 4 1/2"x 4 1/2" card using pinks and grays and blues.  I stamped the flower image and colored it in with a blender pen and added a sentiment when I decided it needed something a bit more.  Buttons, ribbon, pearls and crystals just didn't look right... hmmmm.  Why not try cracked glass?  So off to Michael's I go in search of Ultra Thick Embossing Enamel (besides the UTEE I ended up coming home with 2 pairs of flip-flops, sponges, black embossing powder, and stickers).  But once I thought about it, I really didn't like the idea of the sentiment being under the UTEE and thought it would look better as a separate layer.  So back to the drawing board I went...  and this is what I came up with:  a traditional 4 1/4" x 5 1/2" card in shades of purples and greens using the cracked glass technique.
     This was the first time I had attempted to use UTEE and I really liked it.  It's used the same way as traditional embossing powder (VersaMark, powder, heat tool) but you do 3-4 four layers instead of just one.  I found an awesome video tutorial on it by Beate over at Split Coast Stampers and it helped me a lot.  I wasn't quick enough to add the additional layer of UTEE after the heating so I ended up adding VersaMark between the layers.
     Making the glass "crack" made me a bit anxious.  After all, I had just spent a good hour or so deciding what I was going to make (for the second time) and painstakingly colored all the flowers and leaves with a blender pen.  It bent easily but didn't really crack like it was supposed to.  It's been quite humid in NH for the past week or so and I found that sticking the cardstock in the freezer for a few minutes made it easier to crack. 
     But I think the most exciting thing about this card was how I learned to use the "micro" button on my camera for close-ups!  It's been a year and I'm still figuring out how to use it.  Maybe I should actually read the owners manual... nah, it's more fun to find out as you go along.

Stamps: Elements of Style
Paper: Mellow Moss (retired), Perfect Plum, Very Vanilla
Ink: Mellow Moss, Perfect Plum, VersaMark
Tools & Accessories: Blender pen, ultra thick embossing enamel (not SU!), dimensionals, vanilla taffeta ribbon

July 16, 2010

Flowers and Blooms

Hello!
   I'll be the first to admit that I have difficulty with changes.  I'm lucky enough to say that for almost 34 years my life has been pretty consistent.   I like my life to be predictable, dependable and in a nice, neat order.  I can safely say that the littlest change in family tradition could cause me to have a near apoplectic seizure.  Even my classroom is neatly organized and run in a series of routines that rarely changes (I have had lots of positive comments by both colleagues and parents that appreciate my attention to routine).  You can imagine what it's like for me each July when Stampin' Up! changes their entire catalog!  
     When I purchase items from SU! I try to choose things that will be around for a while.  I usually don't give in to the mini catalog stamp sets or the embellishments that will be around for 4 months.  What if I got attached to them and then wasn't able to purchase them again?!  Just thinking about that possibility gets my heart racing...
   Today's card is the perfect example of this.  I love the Flower Fusion kit SU! offered last year but was hesitant to purchase it and actually use the embellishments because I knew they wouldn't be around forever.  But I finally gave in and purchased a set.  It wasn't until after I saw SeattleStampers card over at SplitCoastStampers that I knew I just had to do something with the tin that had been sitting in my craft room for months. 
     I kept the color palette the same (I love Pumpkin Pie, Rose Red & Old Olive together) but to make the card a bit more of my own I changed the layout (just a teenie bit) and the sentiment. 
     So I used my Flower Fusion kit.  But what if I want to make the card in the future and I run out of felt flowers?!  Agggghhhhhhh! (deep breath, unclench the hands, deep breath, go to my happy place, breathe...) 
     After calming down, I was able to take a close look at the flowers and realized that they look an awful lot like the flowers in the Birds & Blooms Sizzlets dies.  Hmmmmm, I got my creative juices flowing and decided to make the same card again, this time using the Birds & Blooms Sizzlets dies rather than the felt flowers.  Not bad, and thankfully, crisis adverted.
     While I love the original the best, I can sleep peacefully at night knowing that the card can be easily duplicated at any time!  (aahhh, I feel so much better...)  When do I make the card again I think I'll rough up the edges of the flowers and maybe even pop them up on dimensionals, to give them a more realistic feel. 

Stamps: Thank You Kindly
Paper: Whisper White, Pumpkin Pie, Rose Red, Old Olive
Ink: StazOn Black
Tools & AccessoriesFlower Fusion (retired), 1/2" striped grosgrain ribbon (retired), brads, dimensionals, Birds & Blooms Sizzlets die, Big Shot